
Quick takeaway
- ProPack (or the trial) + internet.
- Share your Tracking ID and security key from Settings → Tracking (Copy).
- Turn on Send and/or Get under Options; use bubbles or Group view to watch others.
- Positions are encrypted with your key — change the key to cut off anyone who should no longer see you.
Setup & requirements
Live Tracking connects oziTarget Map to the oziTarget cloud service so you can upload your position and see other pilots, crew, and Ground Control on the map. Tracking on the web app uses the same IDs and keys via crew.ozitarget.com.
1. ProPack
Live Tracking is a ProPack feature. You need an active ProPack subscription (or the 14-day full trial) on the signed-in account. Without ProPack, Send / Get tracking stay unavailable.
2. Internet
Sending and receiving live positions needs an internet connection. oziTarget Map and Standard navigation still work without the network; Live Tracking does not.
3. Shared Tracking ID and key
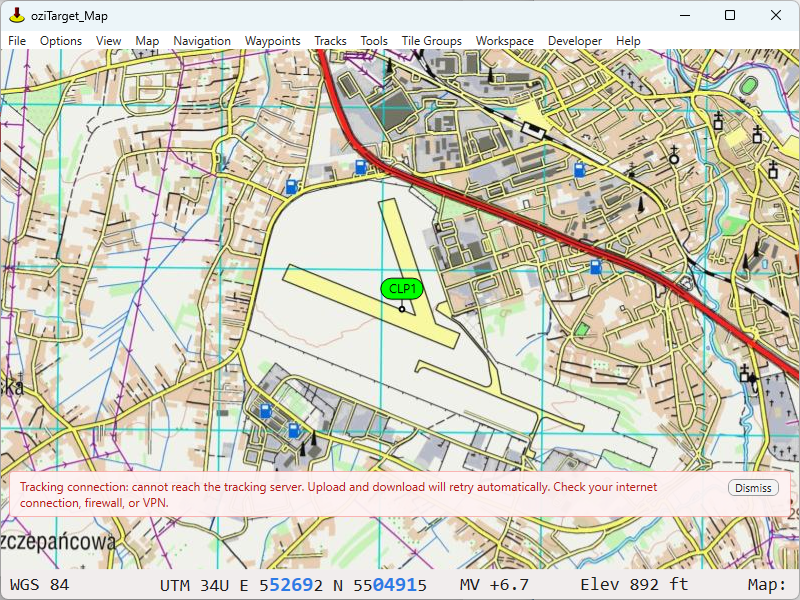
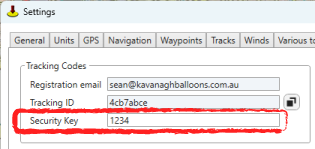
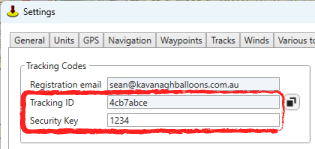
Open Settings → Tracking (or Options → Tracking settings…). Under Tracking Codes you see your registration email, the Tracking ID derived from it, and your security key. Use Copy beside the Tracking ID to put details on the clipboard so you can share it with crew or other pilots. Everyone who should see you must have that ID and the matching key on their tracking list.
4. Display options — bubbles or views
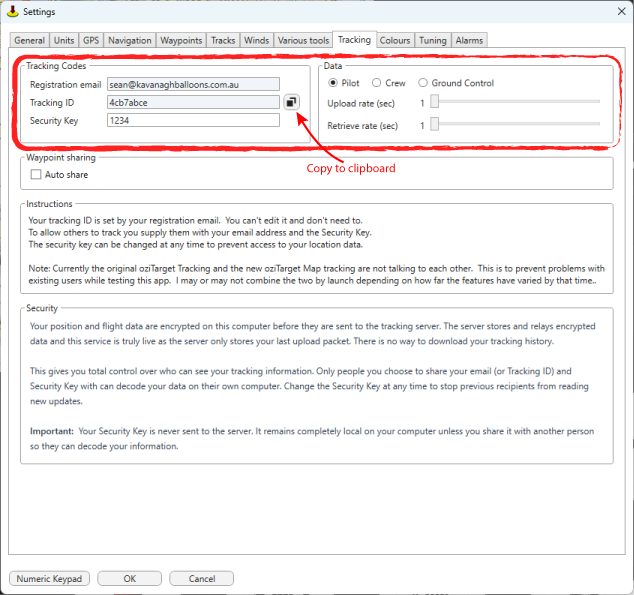
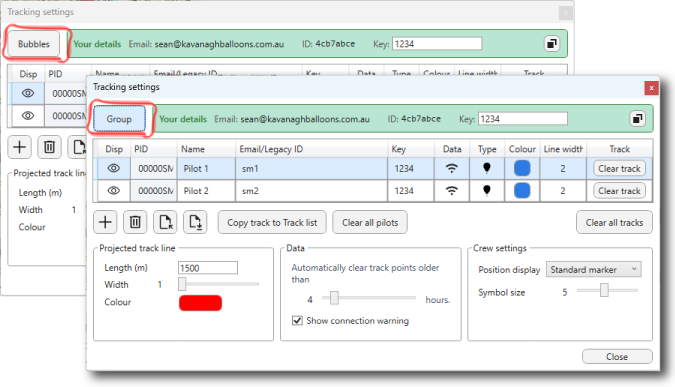
In Tracking settings, choose Bubbles or Group at the top. Bubbles opens each selected tracker in its own compact window. Group keeps everyone in one list with a shared toolbar; the numbered layout button cycles Tracking view 1 (names + one info block), Tracking view 2 (compact Alt/Hdg/Spd grid), and Tracking view 3 (wider grid with Wpt/DTG/Brg/ETE and per-row track controls).
5. Turning tracking on and off
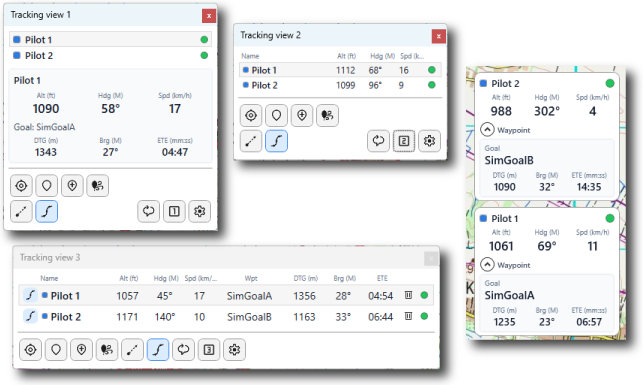
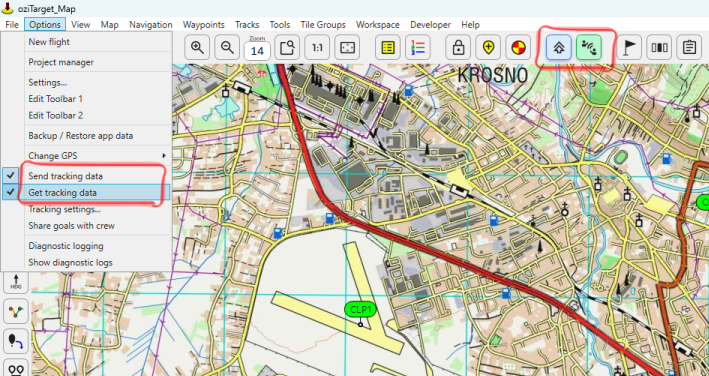
Under Options, check Send tracking data to upload your position (while Start Nav or playback is active) and Get tracking data to receive others. The toolbar Tracking on/off button also turns both Send and Get on or off together.
6. Setting up your team for tracking
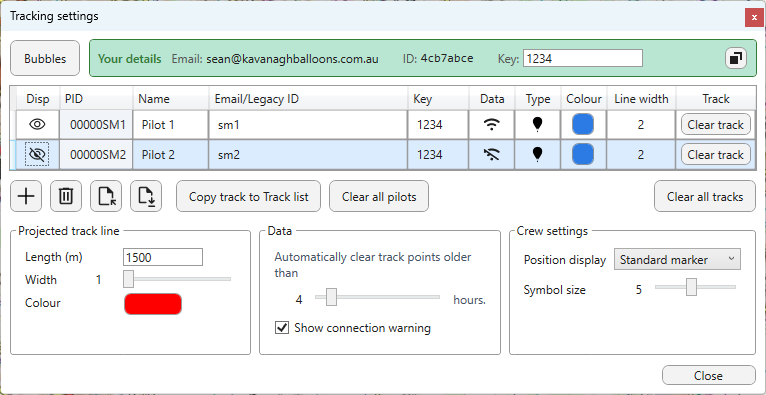
Open Tracking settings and build your tracking list — the people whose positions you want on the map. Add each pilot (or crew / Ground Control), then tune how they appear and whether you request their data.
- Add — use Add pilot to create a row; enter a name, their Tracking ID (or email), and their security key.
- Colour and line width — set the track colour and width so each person is easy to tell apart on the map.
- View on/off — show or hide that tracker on the map without removing them from the list.
- Get — turn Get on for rows you want to download; off skips that person in incoming polls.
- Role — set Pilot, Crew, or Ground Control so the UI and map symbol match how they fly or retrieve.
Security & privacy
Tracking payloads are encrypted on your computer with your security key before they go to the server. The server stores and forwards the encrypted stream; it does not need your key to move the data. Only someone who has the matching Tracking ID and security key can decrypt and display your position.
The security key is entered in Settings → Tracking and stays on that machine for encrypting and decrypting — it is not sent to the server as part of the tracking traffic. Treat the key like a password: share it only with people who should see you (crew, contest office, other balloons in your group).
Changing your key immediately prevents access. Anyone still holding the old key will stop seeing your data; give the new key only to people who should remain on your list. If a key was shared too widely (email, chat history, exported pilot list), generate or type a new one and re-share deliberately.
Tip: exported / imported pilot lists include keys — treat those files like passwords, same as on crew.ozitarget.com.
Sharing data with legacy oziTarget
oziTarget Map and the original oziTarget add-on can share the same live tracking pool when IDs and keys match and the Classic side is on a Tracking build that can work with oziTarget Map.
1. Minimum legacy version
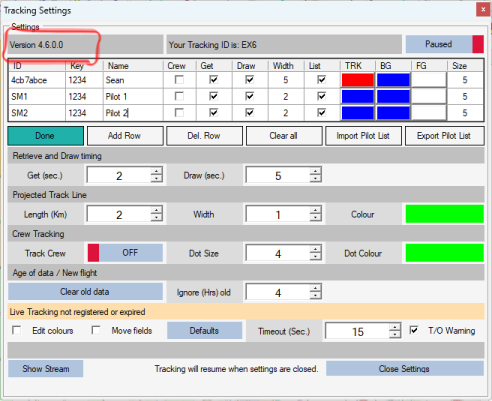
Classic needs Tracking v4.6.0 (or newer). That Tracking update is included in current oziTarget v1.5.3.21 and ProPack v3.6 installers. If you are on an older Classic build, download Tracking from the Classic downloads page.
2. What the oziTarget Map user supplies
- Tracking ID — shown under Tracking Codes (derived from the signed-in account email). Use Copy so you do not mistype it.
- Security key — the same key you use in Settings → Tracking.
- Role if relevant (Pilot / Crew / Ground Control) so the other side knows how to treat the feed.
The Classic user adds that ID and key on their Get / pilot list (and you add them on yours if you need to see them). Turn on Send and/or Get as needed.
3. What the legacy oziTarget user supplies
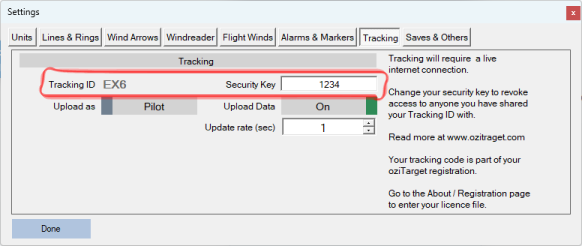
- Their Tracking ID (Classic often uses a short manual id — Map accepts that style on the Get list as well as an email that hashes to an ID).
- Their security key — must match what they use to encrypt uploads.
- Confirmation they are on Tracking v4.6.0+ (see above).
Enter those values on the Map Get list (email or legacy id + key, role, colour). Enable Get on that row and Get tracking data under Options.
4. Missing from legacy oziTarget
Advanced features like push notifications for target selection or wind data are not available in legacy oziTarget. These are exclusive to oziTarget Map.
Related
- crew.ozitarget.com — phone crew app and sim.ozitarget.com test pilots
- ProPack — what Live Tracking includes
- Classic downloads — Tracking v4.6.0 for legacy PCs